Wow, I can't believe it's been more than two months since I last posted! You know how the saying goes, though: time flies when you're...um...really, really busy. (Okay, so I guess that's not quite how the saying goes...)
It seems in most places summer is at the height of its luxuriance. Where I grew up, this is the time when the air is practically throbbing with the drone of cicadas, and so thick with humidity it feels almost heavy. Those things mark the time of the summer to delight in the simplest things: a perfect peach, for instance, is so lush and delicious, satisfying enough to distract from the heat.
Here, though, it feels almost like summer is still just arriving. The days are sunny, but just warm, not what I'd call hot. We've had several small stretches of heat - some quite intense - but after a week or two it cools back down again. It seems very strange to find that, in the middle of August, the blackberries have just begun to ripen. Lately the morning air has been crisp and smelling of autumn.
Still, I've often been hungry for all the things I associate with this time of the year. Maybe it's learned; maybe it's instinct. A few times these cravings have brought to mind the time I spent in Italy. I suppose I have many fond culinary memories from that summer: just-plucked figs that were as succulent and sweet as honey. Bitter espresso tempered with a touch of tart lemon. The ubiquitous insalata caprese, a vivid combination of fresh mozzarella, tangy sliced tomatoes, and lush green basil leaves, all drizzled with full-bodied olive oil. That meal alone is an examination of simplicity; every flavour clear and distinct, in harmony with the others.
But perhaps most of all I remember the little restaurant in...I regret to say I can't recall which city. I don't frequently dine out when I travel; I have always preferred perusing open-air produce markets, small groceries, and (when I still could) bakeries. But this night I found myself ordering something off a menu - a pizza, to be exact. Pizza, in Italy, is offered at even relatively formal restaurants, and an entire small pizza serves as an entree for one. It is eaten with a fork and knife, and the crust is very thin. It truly showcases each of its ingredients. I remember mine was delicious.
What really shines in my memory about that meal, though, was what followed. Though I hadn't ordered them, I was brought a small dish of strawberries - but not normal garden strawberries. These were raspberry-sized, soft, and velvety red, the quintessence of freshness. The cameriere explained that they were local wild fruits and very special; they could not even be transported outside the region, he said, for they just wouldn't last.
That is one of the things I love most about summer - experiencing something so simple at the very moment it is finest, enjoying it in full. I created this pizza a few weeks ago to showcase some of the freshest flavours I could find - also pairing two classic Italian combinations that are generally not found together, but the result was delicious. The first is the aforementioned caprese salad. The other is gremolata - usually used as a sort of garnish, served with meat dishes. The ingredients, though - fresh parsley, minced garlic, and lemon zest - seemed like the perfect thing to add. It gives it a delightfully unexpected bright note to the flavour overall.
Recipe:
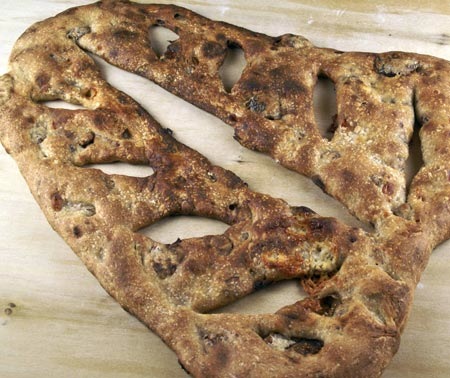
For the dough, use this bread recipe. Halve the dough to serve 2 people, use the whole recipe for a larger pizza. It also works very well to use egg replacer (powdered, such as Ener-G brand) in place of the eggs.
Stretch the dough out flat on a parchment-paper-covered baking stone. Using olive oil to coat, press it very thin with your fingers.
Make the gremolata: mince 1-2 cloves of garlic and 2 T of fresh parsley, and combine with 1 tsp of lemon zest. Cover the mixture with olive oil and spread it across the pizza dough.
Thinly slice 8 ounces of fresh mozzarella and a few Roma or Campari tomatoes into rounds. Layer the cheese and tomato slices to cover the entire pizza, and scatter chopped fresh basil over that.
Place in a cold oven and turn immediately to 400 F / 200 C. Bake for about 35 minutes, or until the cheese has just slightly begun to brown.
Enjoy! (Oh, and by the way...the strawberries were wonderful.)
Saturday, 28 August 2010
Tuesday, 15 June 2010
Some Bread for the Table
Can you believe this is gluten-free?
Look at the way the surface stretches apart, revealing the soft, porous bread beneath. The crust, dusted with extra flour to really bring out the artisan-loaf appearance, is crisp but not hard. The interior is tender and springy. The flavour itself is understated - at first it may seem even a little bland - but this just makes it perfect to be complemented by some rich farm butter.
This is another bread using the cold oven technique. Thanks to the relatively large amount of yeast, the bread slowly rises as the oven heats. This results in an evenly-baked loaf - it doesn't brown too quickly or leave the inside underdone. There is another part to the method, though, that is unusual for gluten-free bread: it has two risings. This is not for the sake of kneading (as is the case with wheat doughs); rather, it helps the flavour and texture of the bread whilst giving the yeast time to multiply.
As with most wheat-based artisan breads, this bread is best when very fresh. That is no problem though - simply gather a few friends around your table and provide some butter, herbed olive oil, or cheese...this loaf will disappear very quickly! It would also be very good shaped into smaller rolls, which may help it last longer as well.
"Pain de Ménage" (Homemade Bread)
Dry ingredients:
150 g potato starch
35 g white rice flour
25 g garbanzo-fava flour
25 g Expandex modified tapioca starch
15 g buckwheat flour
10 g sweet rice flour
1 tsp each of xanthan and guar gum
1/2 tsp pectin (used for making jam; can be found with canning supplies)
1 tsp sugar
3/4 tsp sea salt
1 tsp Ener-G egg replacer (helps with binding and leavening)
Wet ingredients:
2 eggs, beaten
100 mL warm water: add 1 tsp sugar and 1/2 T yeast
30 mL oil (I used canola)
Method:
Blend all the dry ingredients together with a whisk in a mixing bowl. Dissolve the yeast and sugar in the warm water and let it foam for a few minutes. Next add the eggs, yeast mixture, and lastly the oil to the flour mixture, and "knead" with a soft spatula until dough is smooth. If the dough seems too stiff, sprinkle in a little more warm water until it is springy. Now cover the bowl with clingfilm and allow the dough to rise for 30 minutes. This allows the yeast to multiply and develop the flavour of the bread - two things GF bread generally misses out on by having only one rising. (If you want an even more developed yeast flavour, you could try adding an additional rising.) At the end of this time period, squash the dough down and tip it out onto a baking stone covered with a piece of lightly oiled, lightly floured baking parchment. Gently roll the ball of dough in the flour (I used tapioca and potato starch) so it has a visible dusting of flour. Work in some more starch if the dough seems too loose and sticky. Stretch the surface so it is smooth, and tuck any rough edges underneath the loaf. Shape it into an oval, brush it with oil, and dust with a little more flour. Now cut the slits in the top using an oiled knife.
Place the loaf in a cold oven and turn it immediately to 204° C/ 400° F. Bake for 45 - 50 minutes, until the crust is nicely browned and the loaf sounds hollow when tapped. Cool on a rack.
Sunday, 23 May 2010
Yes.
I made the fougasse work this time. And just in time. This weekend is the "Go GF Challenge" - an invitation to non-gluten-intolerant people to try living gluten-free for a weekend, as part of Celiac Awareness Month. And my Love has agreed to take on this feat. (And considering what an avid bread-eater he is, yes, it is a feat.) So I wanted to make something good. Specifically, I wanted to make bread that is good.
And it is.
Is it perfect? Well, no.
Is it a little dry? Yes, but not terribly so.
Will I keep playing with it, and post a revision at some point? Yes, quite probably.
Which brings me to an interesting point, one I've been considering lately.
In trying to replicate traditional breads - a standard that has been set by stretchy, gluten-y dough - I think the true potential of some of my gluten-free baking is being compromised.
Gluten-free dough is wet. Almost always. It is not the sort of thing that holds a shape well. You can turn out a perfectly good, soft loaf of bread, but to get there, you probably had to spread batter into a pan. Wheat bread shapes easily. To replicate that shape with a GF dough (and even to make a dough, not a batter) I've found the finished product often lacks moisture. I'm sacrificing texture to carry on the tradition of appearance.
Alternatively, sometimes I compromise appearance to get a more flavourful flour blend. Sometimes I give up on whatever concept I had in mind, and instead focus on creating something unique. In fact, some of my best results have come from not trying to make any specific thing, like my Honey Sandwich Bread. It will definitely be very good in its own right, but the flavour and appearance won't necessarily resemble any particular type of wheat bread. And in many cases, that's fine.
However, I've written before about my thoughts on traditions. Food traditions. Bread traditions.
This is my dough just before I put it in the oven. It looks, I imagine, much like fougasse in Provence has looked for generations.
It's said that the slits are meant to resemble an ear of wheat, but the design arose more from practicality than pure symbolism: this originally was what bakers would make from leftover dough as their ovens cooled at the end of the day. The slits ensured that even as the oven temperature dropped, the bread would cook all the way through. Eventually it became popular in its own right, and is now a recognisably traditional French loaf.
Here it is freshly baked. Just as it should look.
But I know it could still taste better in some ways. How do I choose, though, between the way the bread of my heritage looks, and how the bread from my memory tastes? I don't think that would be fair, really. To me, the idea of bread - and what it means within a culture - is nearly as important to enjoyment as the taste.
Part of me knows that I am now a part of a different culture - the one of gluten-intolerant people coming together to create (and, of course, share) good food. And the internet is such a wonderful tool for uniting this relatively new community. Yet other parts of me still feel the pull of connection to something older, as if I'm carrying on a story that's been told for generations. Which do I bring to my table? I don't think it's a choice I could make. And honestly, I don't think I have to choose; I believe I can find a balance.
So I keep baking until I find that balance. It will just take time, patience, and a lot of loaves. Many may not be perfect, but they are certainly still good. Good enough to call my own.
So in the meantime...have some bread. Enjoy.
Fougasse with Herbes de Provence
100 g potato starch
50 g tapioca starch
25 g buckwheat flour
20 g sorghum flour
20 g Expandex modified tapioca flour
15 g brown rice flour
10 g chestnut flour
5 g soy flour
3/4 tsp salt
1/2 tsp pectin
1/2 tsp guar gum
1/2 tsp xanthan gum
2 tsp Herbes de Provence
100 mL (about 6 T) warm water
1 - 1 1/2 tsp honey
1/2 T yeast
Mix the flours, salt, pectin, herbs, and gums in a medium bowl. In a large bowl, beat the egg and oil together. Add the honey and yeast to the warm water, and let it foam for a few minutes. Meanwhile, work about half the flour into the egg-oil mixture. Next add the yeast-water, followed by the rest of the flour. If the dough is too sticky, work in an additional tablespoon or two of tapioca flour.
Place a sheet of parchment paper on a baking stone and set the dough on it. Lightly press out the dough with your hands, stretching it lightly outward as you press, and shaping it into an oval. Make 6-10 diagonal slits with a wet knife, and stretch the slits apart with wet fingers. Make the slits large enough that they will not close as the bread rises (see the picture of the unbaked loaf). Brush all exposed surfaces with olive oil. Set the baking stone in a cold oven and turn it immediately to 210 C/400 F. Bake until the loaf sounds hollow when tapped, about 30 minutes. Allow the bread to cool completely before eating.
Labels:
bread,
dairy-free,
French recipes
Saturday, 15 May 2010
Take Two
French fougasse with Herbs de Provence: sounds just about perfect, no?
Well. It cracked again.
I only seem to have this problem when I try to make flat loaves. Maybe it's a surface area problem - no loaf tin to restrain the sides of the bread as it puffs.
Result: more ugly bread.
This round was a little more chewy, even more flavourful, and had more air pockets than my last attempt. This dough is being very stubborn, though. Now it's a little dry instead of being too wet...yet it still split. But you know what? I am more stubborn. And it's a beautiful sunny spring day here. I'm going to walk to the Co-Op to get some more cage-free eggs, so I can try again.
And hopefully the rain stays away until well after I perfect this bread - it would be delightful to have a picnic. Herbed rustic bread, some cheese, fruit, maybe some wine...oh dear, now I'm going to be daydreaming about France. I think it's this warm sunny weather, making me fanciful - it's usually cool and rainy here!
Anyway, they say the third time's the charm, right? If that's true, I will have a recipe to share very soon!
Friday, 7 May 2010
County Galway Cottage Pie
Okay, I know this is not bread. Not even remotely. But it does go in the oven, and it is traditional, simple, and most importantly, delicious.
It also comes with a little bit of a story.
In the more rural parts of Ireland, many roads have significant stretches that are not lit at night. At. All. Combine this with the fact that further north along the western coast, all of the road markings change to Gaelic (if the road is even marked). So you may find yourself driving in the dark, across what seems to be - as near as you can tell in the dark - a huge rolling pasture with a single narrow path paved through it. (Well, part of it is paved anyway.) All you have to guide you is the reassurance that you can't have possibly taken a wrong turn, because this was the only road on the map.
So here we were, driving blindly forward towards the tiny, dim glow ahead. After a time we came to the town. (Which, much to our relief, was in fact the town we were trying to get to. This is no small feat when you have passed no signs of civilisation for the past hour!) And as we drove through this town, my mum spotted a restaurant that - surprisingly for such a late hour - appeared to still be open.
The inside of the restaurant was not what I'd anticipated. It was very quiet - there was no traditional session music like there would be in a pub, and there were actually only two other people in the place. It also was not homey or quaint like what I would expect in a small coastal town. I was sceptical, but it was really our only option for hot food. Also it was a seafood restaurant. They had to have something good. I ordered, as the menu called it, "baked cod," or something equally ambiguous.
When it was brought to the table, though, it was not just plain fish. It was a sort of pie, with mash potato on the top. And inside was...cream sauce? With fish? I was now very sceptical. I could not think of a single example where fish plus milk seemed like a good idea. But I took a bite, and my mind was changed completely. It was rich, and warming, and completely delicious. Here in this empty, unwelcoming restaurant, I had discovered a brand new comfort food that tasted like it could have come from a cottage kitchen.
And here is the recipe for you.
Cod Pie
(Note: This recipe makes a serving for one person. Measurements are approximate. Increase recipe for the number of individual pies you wish to make.)
For each pie you will need:
One small glass or ceramic baking dish (holds about a cup of volume)
One small cod fillet
One potato, sliced up but not peeled
Milk
Cream
Butter
Thyme, parsley, salt, and pepper
Method:
Heat the oven to 218 C/ 425 F. Place the potato into a pot, cover with cold salted water, and bring to a boil on high. Boil until tender, about 15 minutes. Meanwhile, slice the cod into small pieces and lay them in the baking dish. Pour a little milk and cream over until the fish is about half-covered - enough to thoroughly moisten and flavour the fish, but make sure it won't bubble over the edge. Add some fresh thyme and parsley, and generous amounts of salt and pepper.
Mash the potato with a knob of butter, a little cream, and milk, and season with salt and pepper. Spread the mash in a layer over the fish. Bake for about 30 minutes, until the potato begins to turn golden. Garnish with freshly snipped scallions, if desired.
Enjoy!
Saturday, 24 April 2010
Bread not even a mother could love.
I woke up early this morning very excited to try the new recipe I'd been formulating. You see, the French bakery-café downtown (I've mentioned it before) does an artisan walnut fougasse. It looks wonderful. I end up staring every time I'm in there. Of course it's not gluten-free, though - so it was time to make my own.
I mixed up the dough. A little wetter than I'm used to, I thought to myself, but I'll just work in some more flour and it will be better. More and more flour later, it was still somewhat too sticky and wet. I gave up and shaped it, deciding I'd see what would happen. Maybe it would work anyway, I thought.
I shaped it into a flat oval and cut the characteristic almond-shaped slits through it. It rose nicely. Putting aside my apprehension about its stickiness, I slid it into the oven. Shortly thereafter, delicious smells began to drift from my kitchen. But when I went to take it out...well.

(These photos are from BBC Good Food, Wild Yeast Blog, and MyRecipes.com, respectively.)
I mixed up the dough. A little wetter than I'm used to, I thought to myself, but I'll just work in some more flour and it will be better. More and more flour later, it was still somewhat too sticky and wet. I gave up and shaped it, deciding I'd see what would happen. Maybe it would work anyway, I thought.
I shaped it into a flat oval and cut the characteristic almond-shaped slits through it. It rose nicely. Putting aside my apprehension about its stickiness, I slid it into the oven. Shortly thereafter, delicious smells began to drift from my kitchen. But when I went to take it out...well.
This is what fougasse is supposed to look like:
(These photos are from BBC Good Food, Wild Yeast Blog, and MyRecipes.com, respectively.)
Aaand...here's what mine looked like:
It was cracked, and lumpy, and the nice holes I'd cut were now undetectable from it swelling back together. I cringed and waited for it to cool. But when I tore off a piece, I discovered that it was good. Really good.
Hmm.
So now I have this very tasty dough that apparently produces very ugly bread. I'm going to reduce the liquid, among other things, and keep working on it until it looks as good as it tastes. I'll share the recipe as soon as I fix it, of course.
Have you ever baked something delicious but ugly? Or maybe you've had an utter disaster in the kitchen? I feel like there's a lot more to go wrong with gluten-free dough. (Once I had bread overflow from the pan, and end up all over the bottom of the oven!) What's your worst baking bungle?
Saturday, 10 April 2010
Chelsea Buns with Ginger-Apricot Jam
Last weekend I promised the recipe for hot cross bun dough, once I perfected it. Well...two attempts later, I still wasn't satisfied. I planned to try again this morning, making simple currant buns as it is no longer Easter. However, considering how many people are averse to raisiny things in bread (my Love included, who kindly samples everything that I bake to see if it compares to the gluten-y version), I thought I would do something different.
These are Chelsea Buns, another British sweet, and there are many variations for the filling. Some do indeed have dried or candied fruit rolled up in them, and many are topped with slivers of blanched almonds. I didn't want mine to be too fussy, though, so they are simply spread with a sweet filling and brushed with sugar glaze.
If you wish to make hot cross buns, make the flour blend below and follow the additional instructions I have added to that post. The blend still isn't perfect - the crumb is too close in my opinion - but these buns are certainly good enough to post. This is probably a recipe base I will keep coming back to and adjusting slightly.
By the way - I have just discovered that baking by weight is So. Much. Easier.
No more need to rinse measuring cups between each flour, or worry about the inconsistent measurements that starches are prone to when the air is humid. If you don't already have a food scale, I absolutely recommend getting one - even a very inexpensive one (like mine) can work well.
P.S. - This recipe is long, but it is very easy to do.
Chelsea Buns
Dry ingredients:
60 g tapioca starch
60 g potato starch
25 g Expandex modified tapioca starch
25 g arrowroot starch
20 g sorghum flour
15 g soy flour
10 g chestnut flour
10 g sweet rice flour
1/4 tsp pectin
1/2 tsp xanthan gum
1/2 tsp guar gum
1/4 tsp dough enhancer
1/2 tsp sea salt
55 g sugar
Wet ingredients:
25 mL warm water
2 T canola oil
1 free-range egg, lightly beaten
75 mL warm organic milk
3 tsp dry yeast
Method:
Turn the oven to 200 C. Blend together all dry ingredients in a medium mixing bowl. Dissolve the yeast in the warm milk and allow to foam for 5 minutes. Then mix the wet ingredients into the dry and knead with a flexible spatula until smooth. Lay out a piece of clingfilm and brush it lightly with canola oil. With moist fingers, pat the dough out onto the clingfilm until it is thin.
Spread the dough with the following mixture:
A few teaspoons apricot jam and marmalade
25 g (about 1 T) organic salted butter, melted
2-3 tsp sugar syrup
1/2 tsp cinnamon
1 tsp ginger
Starting from one end, roll up the dough so you have a long cylinder. Now use a sharp, wetted knife to slice the roll into nine buns. Place them on a greased baking tray about 2 cm apart - not touching, but close enough that they will touch once they raise. Allow them to raise for about 30 minutes in a warm place (I like to set them on top of the oven). Bake for 20-25 minutes.
Meanwhile, make the sugar glaze. Combine 2 tsp sugar, 3 tsp water, and a few drops lemon juice in a small microwave-safe dish. Heat on high for 30 seconds or so - you want it to boil thoroughly.
Brush the buns with the glaze immediately after you remove them from the oven, gently pull them apart, and transfer them to a cooling rack. Enjoy whilst still warm!
Labels:
buns,
English recipes,
sweets,
tea
Subscribe to:
Posts (Atom)


